Material List: One piece of your favorite ¾” thick wood, 10” x 7.5” minimum
Design and Make Project – WINE BAR NO.2
 Tool List: ¼” End Mill
¼” Ball Mill
½” to 1” Bowl Cutter
1/32” or 1/16” Tapered Ball Mill
Prep work: Cut wood to 10” H x 7.5” W
Purchase and download above file
In VCarve : Create Design
- Start new file
- 7.5”W x 10”H x 0.867” (your wood thickness)
- Resolution very high unless slow computer
- Go to “Clipart”
- Double click “Wine Bottle Coaster No.1”
- Repeat this to make a second copy of “Wine Bottle Coaster No.1”
- Double click “Wine Coaster Recess No.1”
- Go to “Modeling” tab
- Rename Wine Bottle Coaster No.1 to Wine Bottle Recess
- Rename Wine Coaster Recess No.1 to Wine Coaster Art Recess
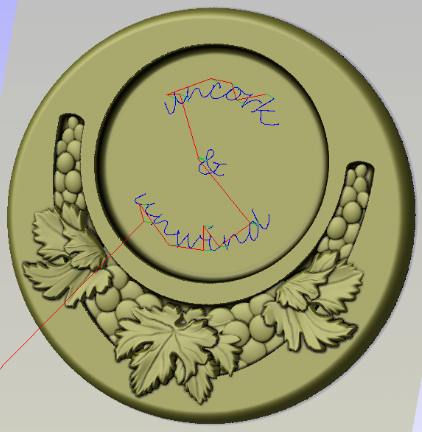
 We now have all 3 shapes added to the drawing but need to adjust their sizes and relationship to each other. We will end up with something that looks like the picture to the right.
- While still in the “Modeling” tab
- Select “Wine Bottle Coaster No.1”
- Select Properties and change shape heights to 0.5”
- Select “Wine Bottle Recess”
- Select Transform Object Size and set to 4”
- Move to desired location
- Select Properties and change shape heights to 0.25”
- Right Click on “Wine Bottle Recess”
- Combine Mode – Subtract
- Select “Wine Coaster Art Recess”
- Select Transform Object Size to 5.25”W x 3.5”H
- Move to desired location
- Select Properties and change shape heights to 3/16”
- Right Click on “Wine Coaster Art Recess”
- Combine Mode – Subtract
- Select “Wine Bottle Coaster No.1”
- Show relationship of all 3 shapes and how to see the “Z” locations
- At the “Modeling” tab, Rename Level 1 to “Coaster Base”
- Create new level and rename it “Wine Coaster Artwork”
- Go to “Clipart”
- Double click “Grape Leaf No.2”
- Select Transform Object Size to 2.4”W x 1.8”H
- Move to desired location at bottom center
- Go to “Modeling” tab
- Rename “Grape Leaf No.2” to “Grape Leaf Center”
- Right click “Wine Coaster Artwork” level
- Combine Mode – Merger
- Change Properties to base height of 3/16” for this level
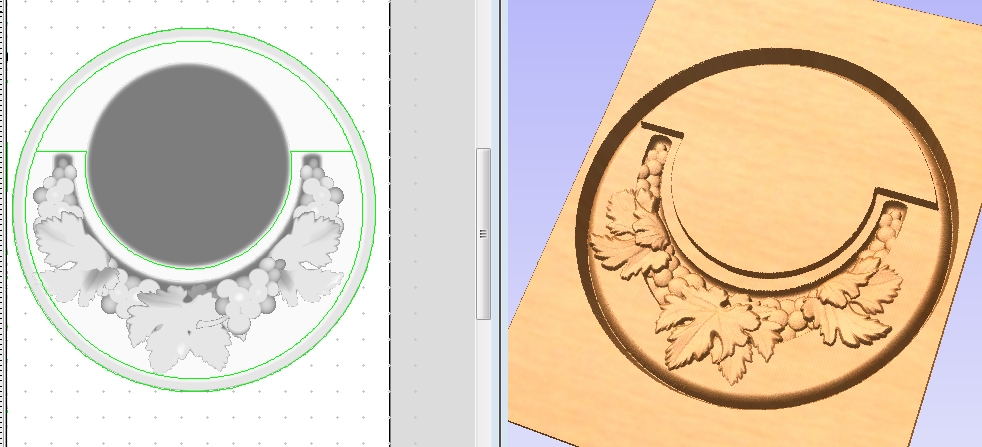
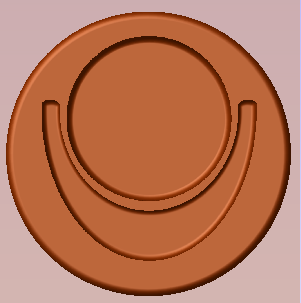
You will notice the Leaf shape seams to disappear into the surface as in the pictures below.

-
- Select “Grape Leaf Center”
- Properties, Change Shape height to 1/8”, Base Height to 3/16”
- Properties, Set “tilt” anchors from top to bottom and change angle until the leaves are completely out of the recess. NOTE: this is a little trial and error and depends on where you set your anchor points. The first anchor stays fixed, the second moves up by the amount entered. Try moving the first point to the other side of the work piece.
- Select “Grape Leaf Center”
We will now apply the same techniques with some of the other artwork in this project.
- Go to “Clipart”
- Double click “Grape Leaf No.3”
- Double click “Grapes No.2”
- Repeat to get a second copy of “Grapes No.2”
- Go to “Modeling” tab
- Rename “Grape Leaf No.3” to “Grape Leaf Sides”
- Rename “Grapes No.2” to “Grapes 1”
- Rename “Grapes No.2” to “Grapes 2”
- Select “Grapes 2”
- Select Transform Object Size to 1.75”W x 1.5”H
- Properties, Change Shape height to 1/8”, Base Height to 3/16”
- Move to desired location on left side of the coaster
- Select “Grapes 1”
- Select Transform Object Size to 1”W x 2”H
- Properties, Change Shape height to 1/8”, Base Height to 3/16”
 Move to desired location on left side of the coaster
- Select “Grape Leaf Sides”
- Select Transform Object Size to 1.7”W x 1.9”H
- Properties, Change Shape height to 1/8”, Base Height to 3/16”
- Move to desired location on left side of the coaster between Grape 1 and Grape 2
- Properties, Set “tilt” anchors from top to bottom and change angle until the leaves are completely out of the recess
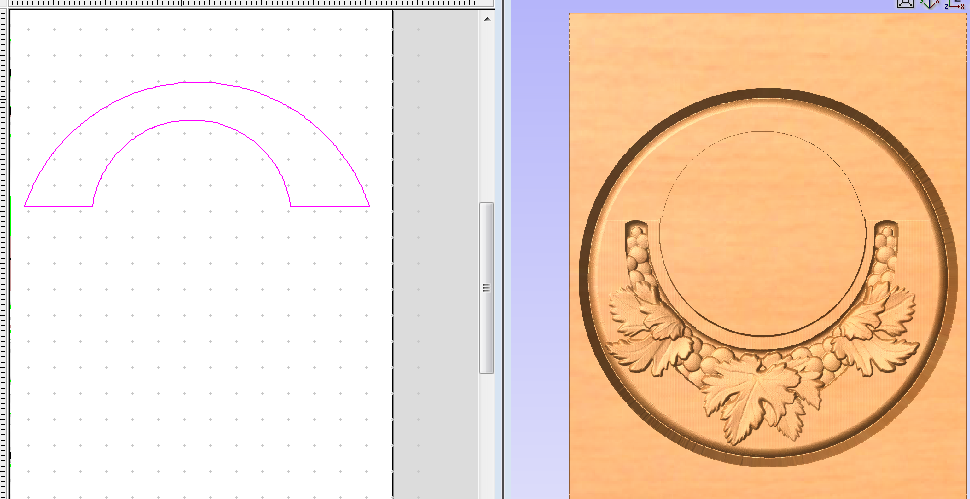
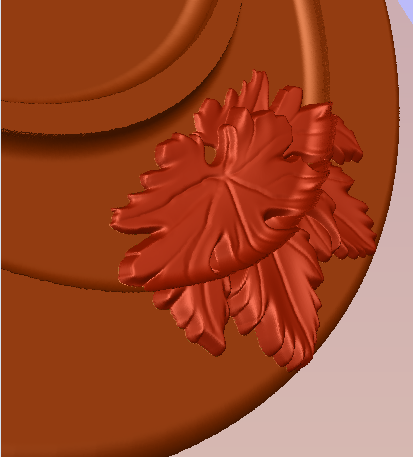
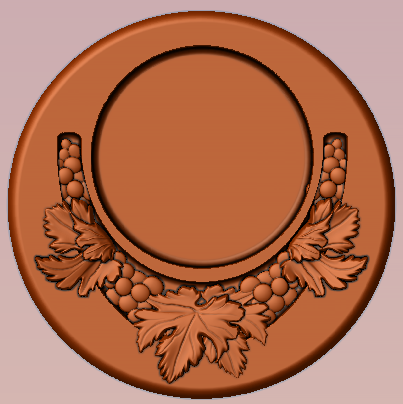
We now have something that looks like the picture to the right.
- In the”Modeling” tab
- Select Grapes 1, Grapes 2 and Grape Leaf Sides
- Transform Objects, Mirror horizontal
- Make sure flip about center and make a copy boxes are checked
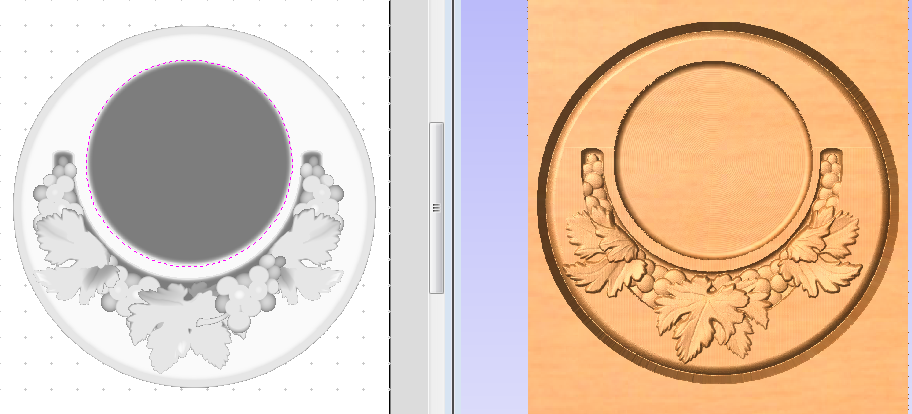
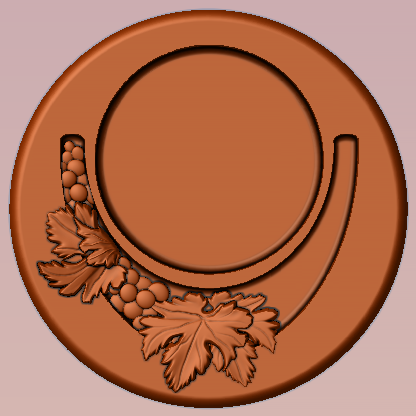
 And you should end up with something like this.
- DONE ready to make TOOL PATHS
In VCarve : Create TOOL PATHS
The following 4 steps are how the finished model you see here today was made. This is a simple and straight forward approach to make something like this wine coaster however there are a lot of inefficiencies with this cutting process that can be resolved by using more creative tool paths. We will discuss those after we run the simulation on the 4 steps below.
- Set properties
- Datum to lower left
- “3D Roughing” toolpath
- Select ¼” EM, Edit with pass depth 5/32, Feed rate 75
- Select Model Boundary
- Boundary Offset 0.125
- Machine Allowance 0.04
- Select 3D Raster
- Name Wine Coaster Roughing and calculate
- “3D Finishing” toolpath
- Select 1/32” EM, Edit with pass depth 5/32, Feed rate 75, step over 33%
- Select Model Boundary
- Select Offset
- Name Wine Coaster Finishing and calculate
- “Profile Toolpath” for perimeter of wine coaster
- Go to Model Tab
- Create vector boundary
- Select Profile Toolpath
- Cut depth 0.89 (or slightly more than the thickness of your wood piece)
- Start depth .5, cut 0.39 (or balance of your thickness)
- Select ¼” EM, Edit with pass depth 5/32, Feed rate 60
- Select Outside
- Add tabs ½ x 1/8 thick
- Edit tabs to better locations
- Name as Wine Coaster Profile and calculate
- Go to Model Tab
The above steps took 45 minutes for 3D rough, 2 hours and 43 minutes for Finish and another 12 minutes to profile cut for a total of 3 hours 35 minutes.
Consider just using the 3D tool path for the actual graphics area and the perimeter radius edge which then results with a 3D Finishing run time of 60 minutes. Then run a pocket with a bowl cutting bit for the wine bottle recess and create more geometry for another pocket to clear the remaining area. Of course you still need to cut it out using a profile path. Bottom line around 1.5 hours total. See pictures on the next page: